There are times when even the most challenging tasks call for traditional mathematical approaches to provide assistance. The ‘3-4-5 method’ is one of those techniques that may unexpectedly prove useful in numerous construction projects.
Is your maths a bit rusty? No need to worry!
Let’s find out what the 3-4-5 method entails and how to effectively apply it!
Table of contents:
- What is the 3-4-5 method?
- What projects can I use the 3-4-5 method for?
- How to use the 3-4-5 method
- The bottom line
What is the 3-4-5 method?
The 3-4-5 method is a geometric technique used in construction and carpentry to ensure the accuracy of right angles, particularly when laying out or measuring large areas. The method relies on the Pythagorean theorem, which states that in a right-angled triangle, the square of the length of the hypotenuse (the side opposite the right angle) is equal to the sum of the squares of the other two sides.
What projects can I use the 3-4-5 method for?
This technique finds application in a diverse range of projects, commonly used in situations demanding verification of squared corners and the establishment of precise 90° angles for construction tasks.
Here are some examples of construction projects where the 3-4-5 method can be effectively used:
Deck construction

When building a deck, the 3-4-5 method helps achieve right angles, contributing to the overall stability and appearance of the structure.
Fence installation
Properly aligned and perpendicular fence corners are essential for a visually appealing and structurally sound fence. The 3-4-5 method aids in achieving this.
Room framing
In interior construction, particularly when framing rooms, maintaining precise right angles is crucial for accurate dimensions and overall stability.
Patio or paving installation

Ensuring square corners and accurate angles is important when laying out patios or installing paving stones to create a visually pleasing and structurally sound surface.
How to use the 3-4-5 method
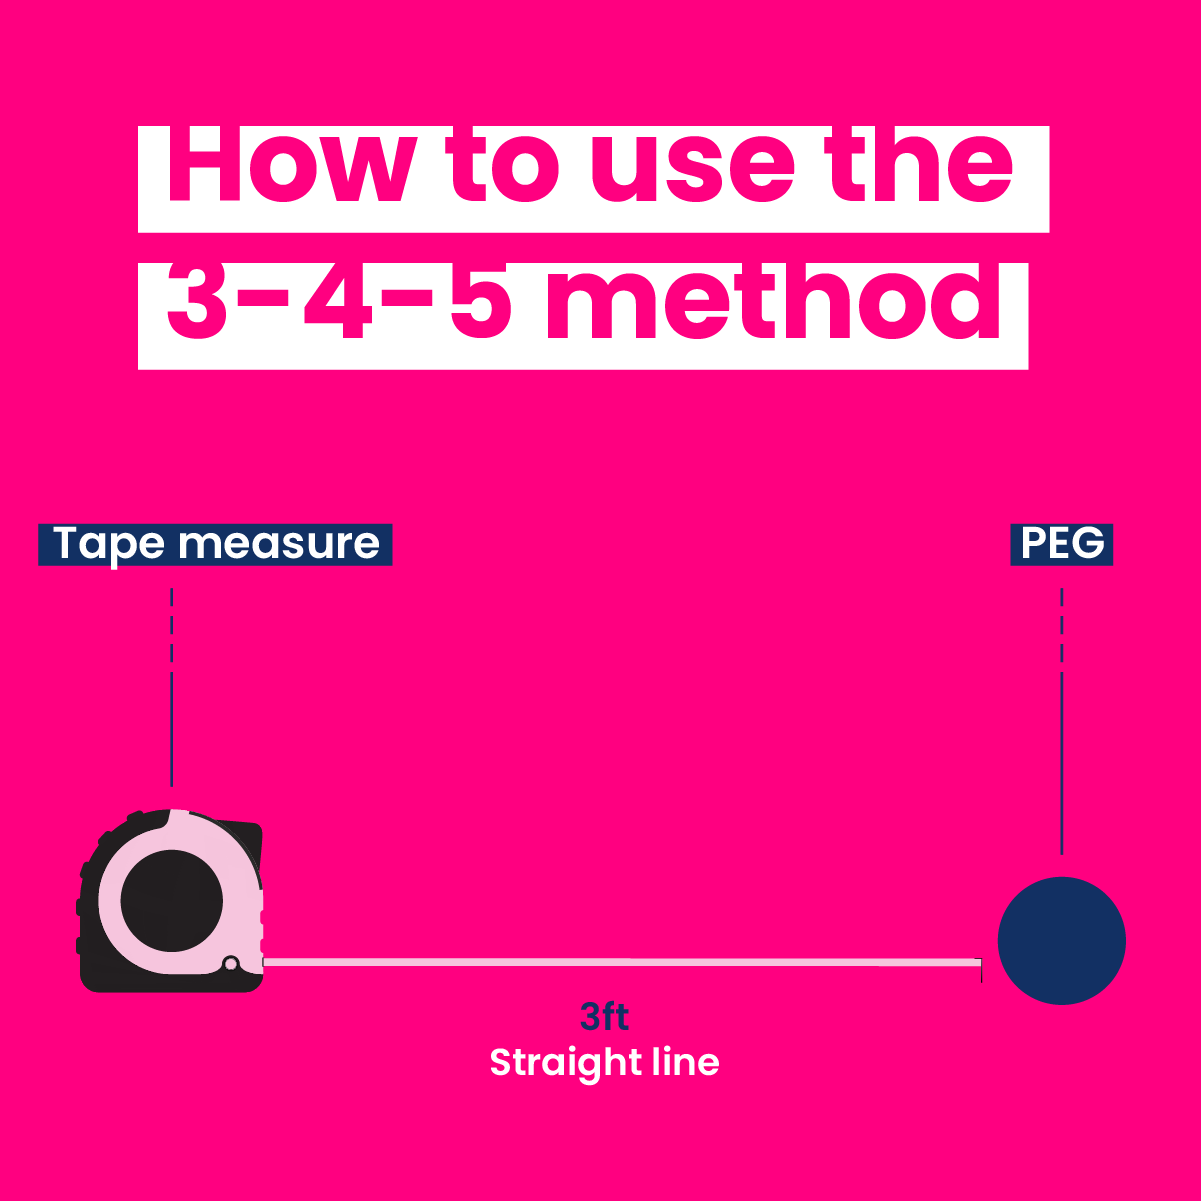
The 3-4-5 method is commonly illustrated by creating a triangle shape. One side is measured at three feet (the straight line), the second at four feet (the perpendicular line) and the last at five feet (across) – hence the aptly named ‘3-4-5 method.’
Materials needed
- Essential items for this task include:
- String
- Tape measure
- Three timber pegs or pins (one for each corner of the triangle)
For this demonstration, we’ll refer to pegs. And here are the actual steps:
Step 1: Corner peg placement
Place your first peg at the corner where you want the 90° angle to form (the corner where the shorter sides connect).
Step 2: Extending three feet
Using your tape measure, extend outward a distance of three feet from the first corner peg along the straight line.
Step 3: Second peg positioning
Position the next peg at the end of the three-foot measurement.

Step 4: String connection
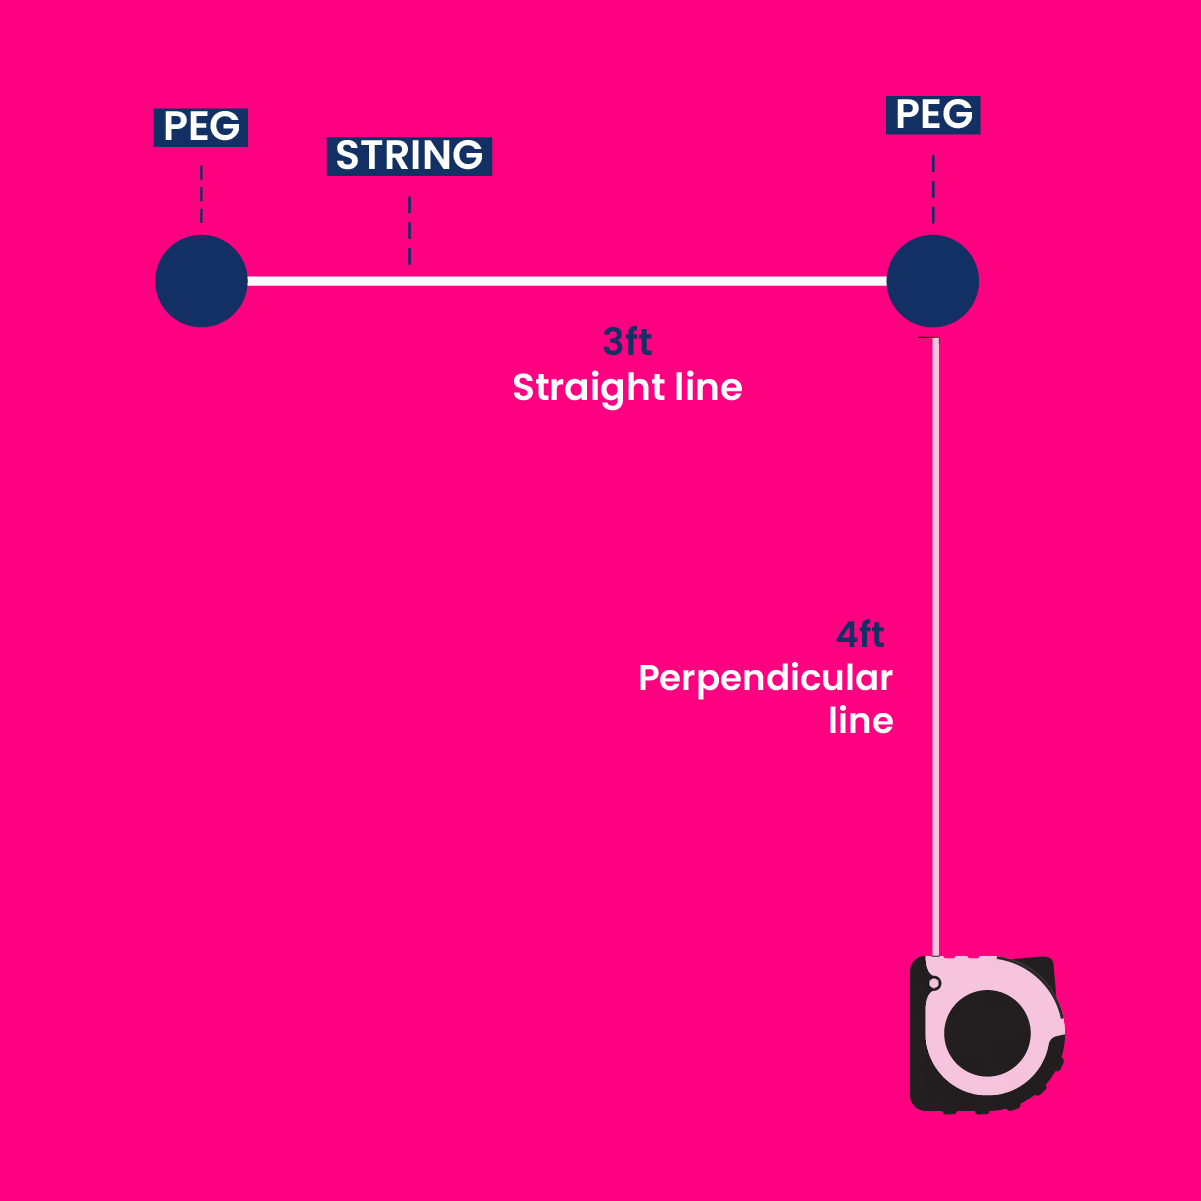
Attach a string from the first peg to the second peg, ensuring it is pulled tight for accurate length.
Step 5: Extending four feet
Again, using the tape measure, extend outward a distance of four feet on the perpendicular line from the first peg.
Step 6: String attachment to the new peg
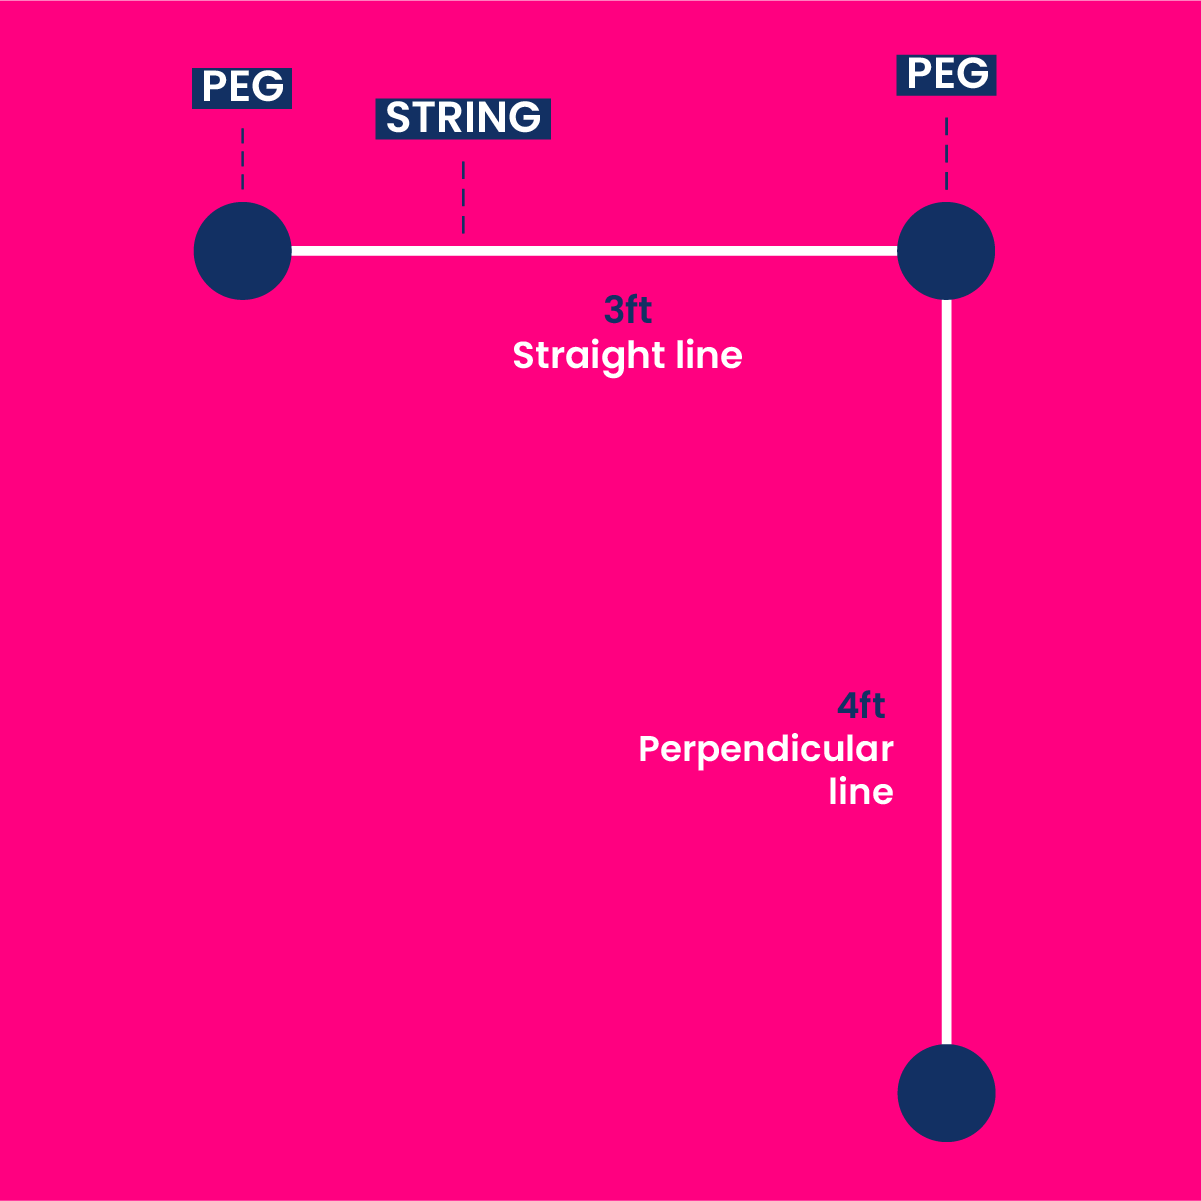
Once more, place a peg at the end of the four-foot measurement and attach a string from the first peg to the new peg.
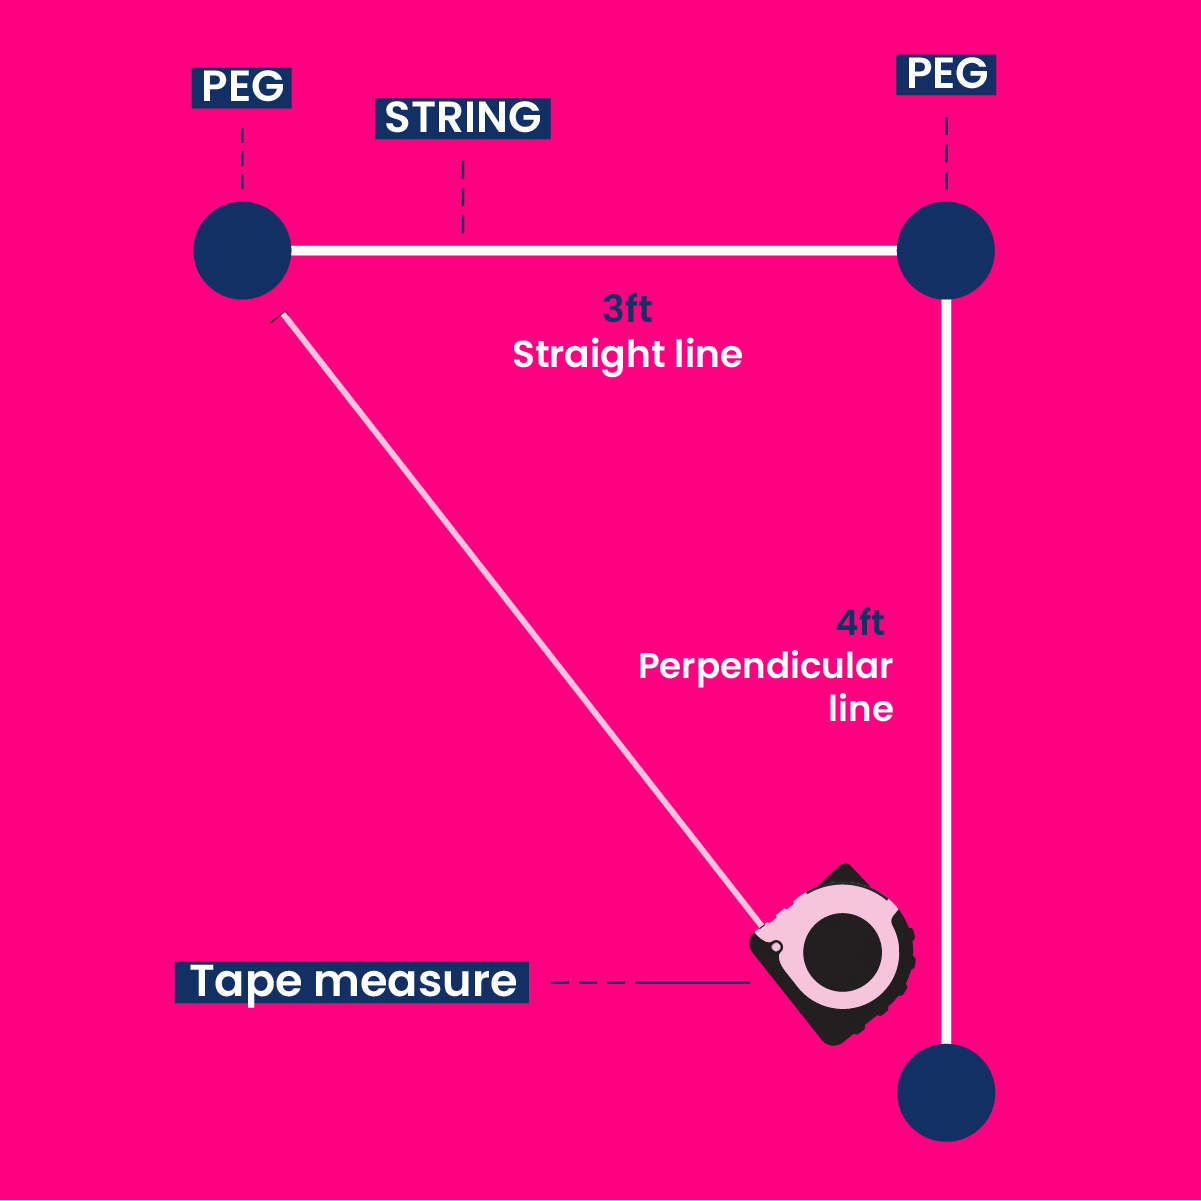
Step 7: Verifying five-foot distance
Measure the distance between the second and third peg; this distance should be five feet.
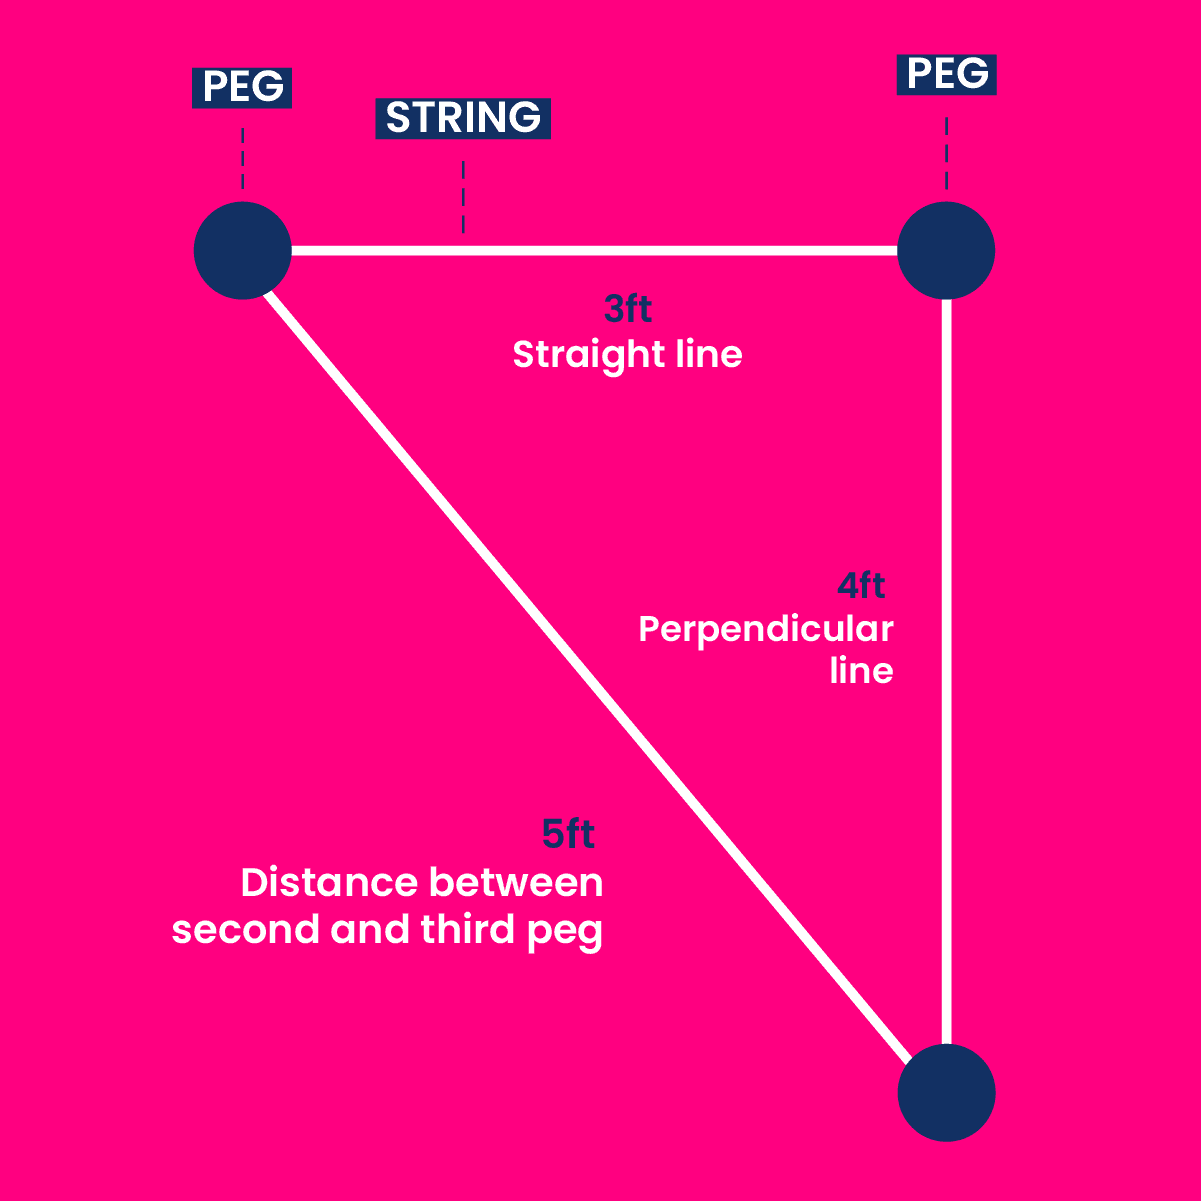
That’s all it takes! By following these steps, you should achieve a perfect 90° angle at the location of the first peg!
The bottom line
Who would have thought good old-fashioned geometry could be so useful?
Remember:
The 3-4-5 method provides a simple and effective way to check for right angles without the need for complex calculations, making it a valuable tool in a wide range of construction scenarios.


