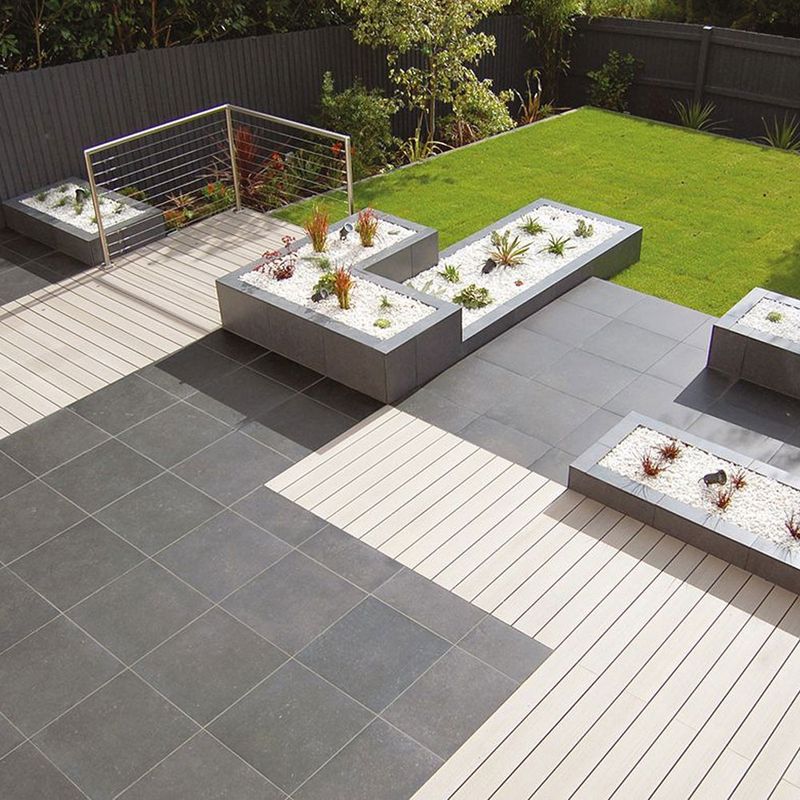
Porcelain slabs are the peak of elegance, sophistication and sturdiness. They offer a grand aesthetic benefit to any outdoor space, serving as a tough and durable solution for homes old and new.
So, we know of their beauty and robust design, but what about their installation? Well, that’s another matter. As popular as they are, the fitting process might be daunting. So, we’re here to help you out.
In this guide, you’ll learn how to lay porcelain slabs outside, discover what slurry is for porcelain slabs, why grout is needed and how to cut the porcelain slabs to the correct sizes. Make sure to read all steps as each section is vital for the fitting process.
Table of contents
- Your first step is finding the tools you need
- Onto the fitting process – starting with preparing the base
- Priming the porcelain slabs
- What to do after laying porcelain slabs down
- What you need to do when you’re cutting porcelain slabs
Your first step is finding the tools you need
You want a patio, driveway, or path (whichever you choose, perhaps all three), but you won’t get anywhere without any tools. So, what do you need exactly? Well, here’s a list to help you out:
- Mortar (If you don’t have pre-mixed mortar, you’ll need sharp sand and cement)
- Paving primer (Priming slurry)
- Jointing compound
- Joint spacers
- A shovel
- Pointing trowel
- Measuring tape
- Rubber mallet
- Spirit level
- String line
- Hard-bristle brush
You can find plenty of these items here at Landscaping Superstore, including a wide selection of porcelain paving slabs for sale in different colours and sizes to suit your requirements.
If you’re unsure, contact us for advice about what you need or a professional installer.
Onto the fitting process – starting with preparing the base
The base is not a skippable step because it is vital for the life of your porcelain slabs. Not only does it help keep the slabs in place securely for many years ahead, but ignoring the fitting of a base can risk the entire paved area becoming loose. As a result, this is not just an aesthetic letdown but an unsafe one, too.
So, what are the steps involved?
Step one: Measure the area
Using a tape measure, identify the area you intend to cover and mark it with wooden pegs and string. Remove any plants, roots or topsoil in this marked area down to a depth of at least 20cm (200mm).
Using a spirit level, ensure the gradient has a slight fall (roughly 1 in 80) for effective drainage to desired outlets. You can then use a rake to smooth out the surface before using a roller to compact the area.
Step two: Add your sub-base
The amount of sub-base you have will depend on the application:
- For patios: Make the sub-base 10cm (100mm) minimum.
- For driveways: Make the sub-base 20cm (200mm) minimum.
The sub-base will strengthen the foundation and help level it out. It will also shrink the risk of movement beneath the surface when finished – a common cause of cracking.
You will also need to consider the following:
- How often is the surface going to be used?
- What type of loads will be moving on and off the surface?
- What condition is the ground in?
Typically, surfaces subjected to heavier loads will need a deeper sub-base.
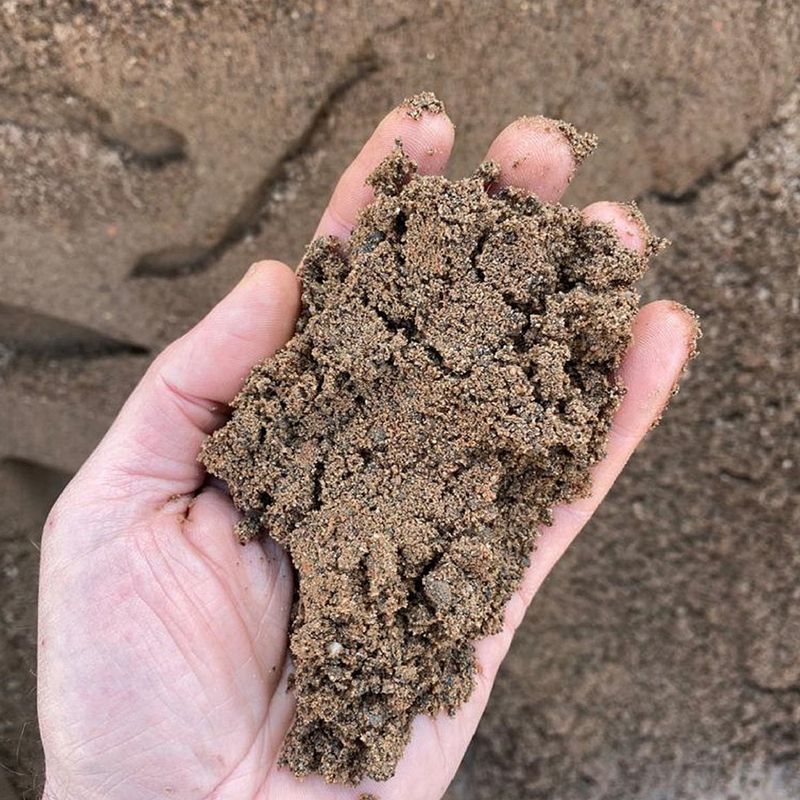
Step three: Create the final base material
Create a mix of mortar with a 4:1 sharp sand-to-cement ratio. You’ll want to work with this while it’s damp. Additionally, lay the mortar down as you place each slab one at a time to prevent the mortar drying too quickly.
Check the manufacturing instructions, but a typical recommended thickness is between 15mm and 30mm. It’s also vital to use a spirit level at this stage to check things are level as you lay the slabs in place.
Priming your porcelain slabs
Porcelain paving is a non-porous product. This means it doesn’t allow liquid or air to pass through it. So, you’ll need a suitable adhesive (priming slurry) to ensure the tiles fit firmly to the newly created base.
How do you do this exactly?
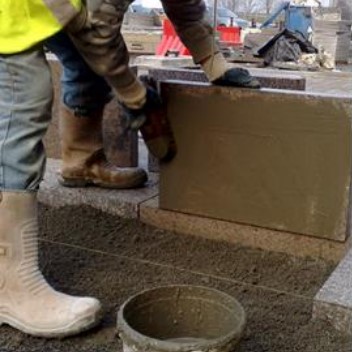
Step one: Mix the adhesive
Using a drill and special mixer drill bit (or an electric mixer if you have one available), you can mix up the adhesive so that it is ready to apply to the paving slab. Follow the manufacturer’s instructions to ensure you have the right consistency when doing so.
Step two: Apply the adhesive
Brush the adhesive mix on the reverse side of the paving slab, then place that slab primer side down onto the mortar bed. You can do this one slab at a time to avoid letting the primer dry out before you can get to it. If it dries the primer will lose its adhesive effects, so do this at a pace suitable for you.
Tip: Sit the porcelain slab on some spare timber battens. This will enable you to reach every edge of the slab with the brush to ensure it is completely coated with adhesive.
What to do after laying porcelain slabs down
You’ve got your base material, and your slabs are primed, so now it’s time for the fun part – making sure the primed porcelain slabs are secured onto the area.
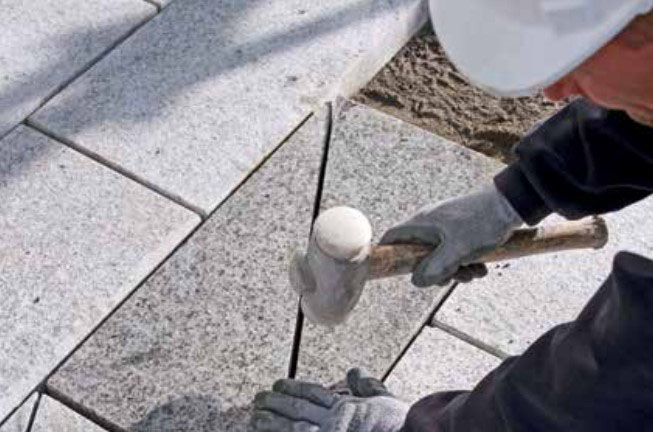
Step one: Gently tap the slabs into place
Grab your rubber hammer/mallet and gently tap each porcelain tile in place. Ensure these are firmly bedded into the mortar base. The entire paving slab must be in contact with the mortar for a durable bond and long-term use.
Use spacers for a uniform appearance and equal distance between each slab, leaving a gap at a minimum of 5mm for jointing material.
Note: Do not use a metal hammer, as this can crack or chip the slabs when struck with too much force.
Step two: Ensure the slabs are level
Once you’ve positioned all the slabs, grab your spirit level again. Each slab should be level with both the ground beneath and one another. If the slabs are at different levels, this increases its risk of being a trip hazard and becoming damaged. So, ensure they do not go unchecked.
Step three: Clean up the primer and add jointing compound between the gaps
After checking the levels of the slabs, clean off residual primer (if any) from the surface of the slabs. In those 5mm gaps left earlier, fill them with a jointing compound. Once added, brush away any excess product.
This will help create a smooth surface and keep the slabs firmly in place. The jointing compound will also help prevent moss and weeds from growing between the slabs as time goes by.
Step four: Let the area dry for at least 24 hours
During the 24-hour drying process, do not allow anyone to walk over the slabs.
If the forecast has predicted wet weather, cover it with tarpaulin or a similar waterproofing material. This will help prevent rainwater from meeting the surface, trickling through the joints and reaching the water beneath.
You’ve done it! You now know how to lay porcelain slabs. It’s time to enjoy the results of your labour.
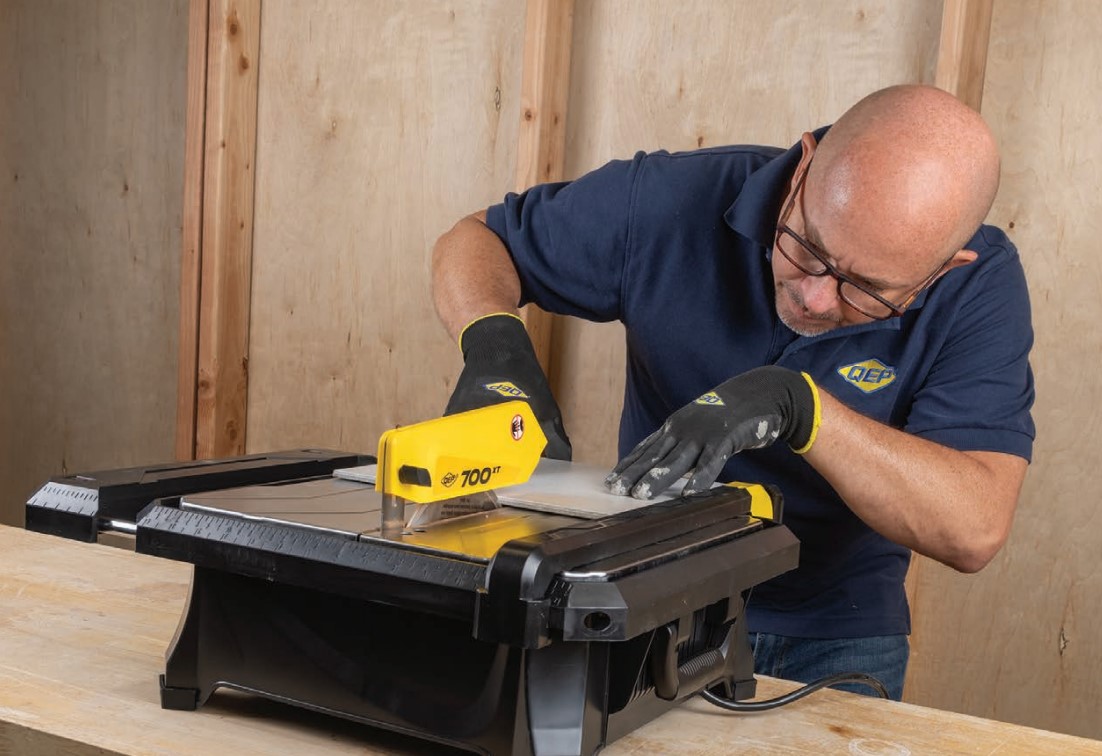
What you need to do when you’re cutting porcelain slabs
You’ll likely need to cut your porcelain slabs; especially if you’re installing them on a large surface area or have a specific design in mind. So, here are some things to remember before and during your cutting process.
First, stay safe with proper equipment
You’re going to use cutting tools (power or manual). So, ensure you have the right protective clothing to keep you safe, including:
- Goggles
- Facemask (FFP3)
- Ear defenders (with ear plugs if necessary)
- Protective gloves
- Safety boots
Don’t skimp out on the cutting blade
Accuracy is vital when cutting porcelain slabs. As such, ensure you have a diamond blade for precise cuts and a cleaner finish.
Speaking of precision, mark what you want to cut first and move the blade slowly along the cut line to help maintain that accuracy. Use a bench saw, too, as this will help make cutting the slab easier.
Sand down the sawn edges
Any newly cut edges should be sanded using a suitable diamond polishing pad. This will help support the finish to the highest quality.
If you don’t feel comfortable cutting the slabs yourself, invest in the help of a professional installer.

That’s all there is to it! Now you know how to lay porcelain patio slabs.
Do you want to add artificial grass to fit alongside your new porcelain slabs? Perhaps you want some garden furniture and need ideas for your new space. Whatever the garden or landscaping project, there’s plenty of advice to help you out. So, head on over to our guides for support with all your favourite products, projects and more.
Was this guide useful?
Mentioned in this project guide:


