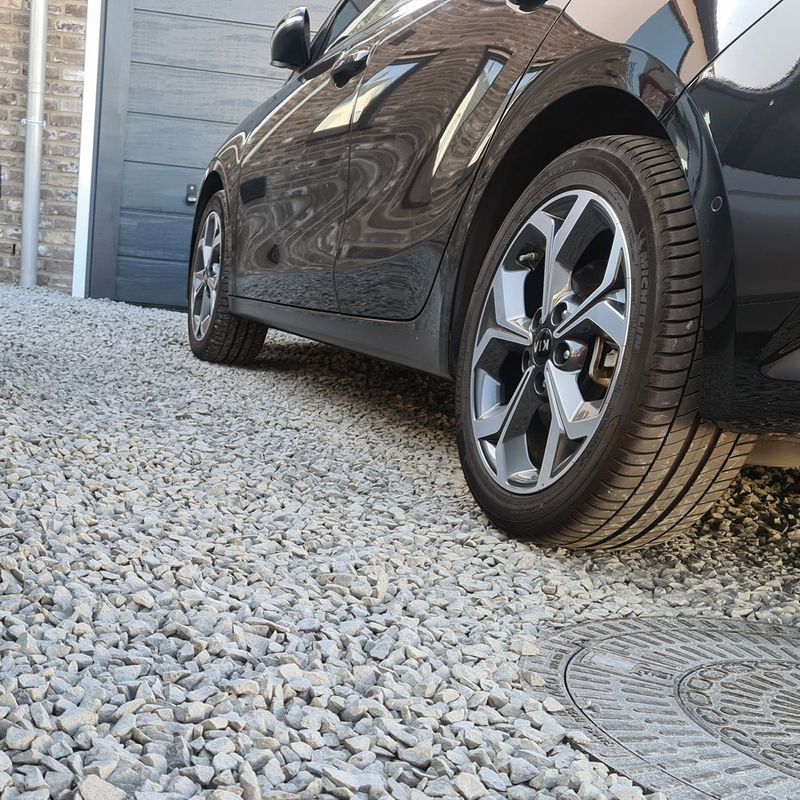
A gravel driveway is a wonderful addition to the home or building. Not only this, but it’s useful too as a usable space and, as space grows as a popular feature in the housing market, parking can be limited on streets in more built-up areas. So, building a gravel driveway is a great way to add value and convenience to your property.
At Landscaping Superstore, we have everything needed to create a gravel driveway. This includes gravel and aggregate, weed barriers and more.
Read on to find out more about building gravel driveways.
Table of contents
The benefits of building a gravel driveway
A gravel driveway is brilliant for many reasons. Here we explain why.
Low cost
Gravel driveways are one of the most cost-friendly solutions in today’s climate. This is just one of many reasons why their popularity has increased over time. Not only is the material required low-cost, but gravel driveways can be installed by almost anyone, which helps minimise labour costs even further.
Easy installation
Due to their design, gravel driveways are super quick and easy to install. Soon after laying the gravel and after it has compacted, the driveway can be used. You don’t need to wait around for materials to dry or harden.
Variation
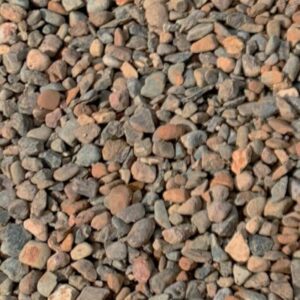
Gravel is available in a wide range of colours and sizes, meaning you can customise the colour of your driveway and ensure it matches your home style or contrasts to create a striking finish. Check out our range of gravel for more detail.
Drainage
Consisting of many small gravel pieces, gravel driveways are exceptionally porous to allow water to naturally drain away into the soil. This means fewer puddles, plus a lower risk of flooding in times of heavy rainfall.
Be aware, that a downside of installing a gravel driveway is that it may need to be maintained. Ruts could develop in time in areas where the gravel is compressed regularly. So, these will need to be refilled. Additionally, when the gravel becomes wet, it may shift within the soil, leading to a significant accumulation of dirt that may end up scattered around the exterior of your home.
How to build a gravel driveway step by step
There are stages to building a gravel driveway. Here are these stages in some simple steps to guide you.
 Preparation and planning
Before you create a gravel driveway, prepare a plan for the work ahead.
The driveway needs to be accessible and wide enough to let cars (and other large vehicles like delivery vans) through. Driveways should also always be designed in a way that allows rainwater to run off and into a drainage channel or drain through the soil. This ensures that rainwater does not create puddles in the centre of the driveway.
Mark out the area
Once you’ve planned the dimensions of the driveway, take several stakes to mark out the driveway. Place them at intervals around the driveway area, attaching them with string. Then measure the length and width of the driveway to calculate the dimensions. If working with a curved driveway, splitting up the total area into sections is recommended. This helps make calculating the length and width more manageable.
Calculate the amount of gravel required
Decide on the depth you’re looking to fill with gravel – professionals will generally recommend laying a minimum of three layers of gravel to increase stability. Generally, for an area of about 0.25m2, a 20kg bag of material is recommended. When it comes to the size of the gravel layer, aim for a thickness of approximately 80mm.
Now, there is a way to calculate the amount of gravel needed more accurately. To calculate how much gravel you need, multiply the length and width by the depth to find the volume of gravel needed.
For example, 6m long x 4m wide x 80mm = 1.92 metres cubed of gravel required.

Ensure you have gravel and tools required
After working out what amount of gravel you need, you can go ahead with buying your gravel. Have a rake, shovel, wheelbarrow and gloves, as well as a compactor handy. These items may need to be rented as they are expensive to purchase for a single project.
Remove the top layer
The next step is to prepare the area. If you need to, remove the top layer of soil, grass and dirt. Then dig 80mm per layer of gravel. Whilst digging the area, ensure that the driveway area is relatively level, and adjust where required. Levelling out the area will minimise the risk of pooling rainwater and puddles from forming.

Compact the area
Once the area has been prepared and levelled, use the compactor, or drive over the area repeatedly with a heavy vehicle to compact the soil.
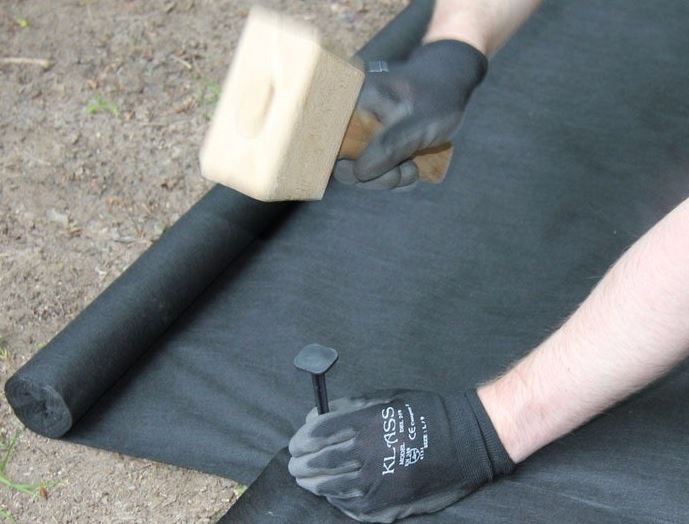
Lay weed barrier
After you’ve compacted the area, lay your weed barrier or landscaping fabric down to prevent weeds from growing through the gravel. There needs to be enough to cover the total driveway area. Try to exceed the driveway area by half a metre or so to ensure the rolls of fabric can overlap slightly.
Consider using timber battens at this stage. You can also use bricks or another form of heavy material if timber battens are accessible. Whatever you use will act as a border and hold the weed fabric in place before the gravel is installed.
Spread the first layer of gravel
You can spread the gravel with a wheelbarrow, shovel and rake if desired, just make sure that it is even across the driveway. Once finished, use the compactor to secure the gravel in place. Then repeat with the following layers of gravel.
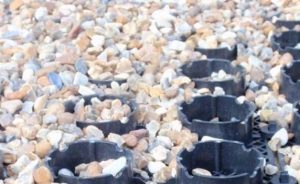
Another option is gravel grids. You can use these to ensure the gravel remains evenly spread across the area. If using these grids, place them on top of the weed barrier before laying any gravel. Distribute the gravel across the grid evenly. Make sure each space with an equal amount of product.
Not sure how to use a gravel grid? Follow the link to read our guide on that.
Ensure the centre is elevated
Once the gravel has all been laid, you need to check the driveway is elevated slightly in the centre with the sides being slightly lower, especially if there is channel drainage along one of the sides. If required, do this by adding extra gravel in the centre of the driveway, and raking gravel from the edges up towards the centre.
Remove stakes and rake excess gravel
With how to build a gravel driveway all done and dusted, it’s time to clean up!
Remove the guiding stakes and ensure no gravel is in the surrounding areas. You may need to shape the driveway using a rake over time, as gravel can become displaced when in use.
Is gravel driveway not your style? Check out how to block pave a driveway, learn about the benefits and use our step-by-step guide to understand why it could work for you.

Was this guide useful?
Mentioned in this project guide:


